Create A Page Of Collections or Subset of Collection on A Page in Shopify for the Supply Theme
This tutorial uses the Supply Theme to create a Subset of Collection on a page in Shopify, but the principle will work on other themes. You can use existing code within the theme with minor changes for your custom page. The code changes should only take a few minutes.
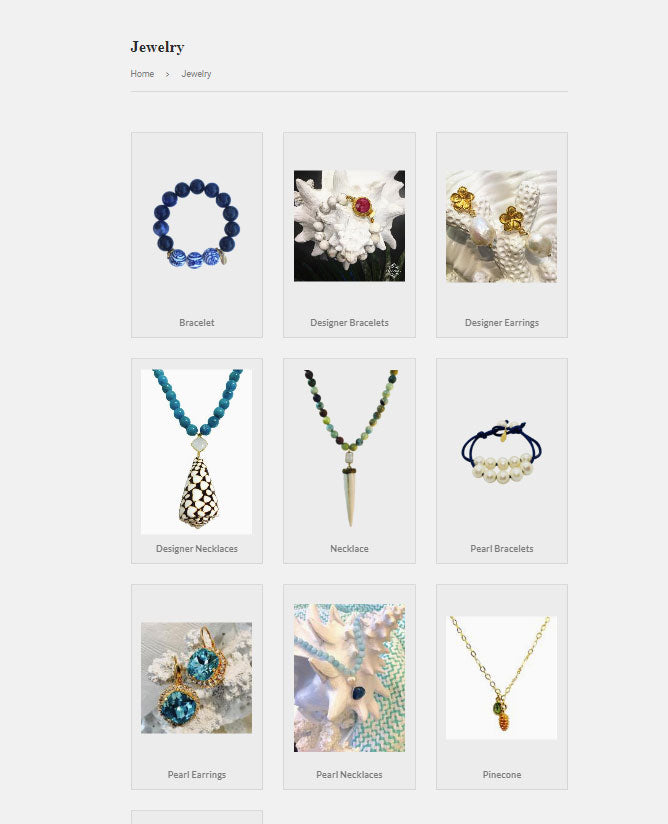
Adding a custom page template to your Shopify theme will allow you to create a custom page with only collections you specify. For instance, you can make a page called Jewelry and have only the Bracelet Collection, Necklace Collection, and Earrings Collections, then you could create another page called Designer Jewelry and list only the Designer Bracelet Collection, Designer Necklace Collection, and Designer Earrings Collections.
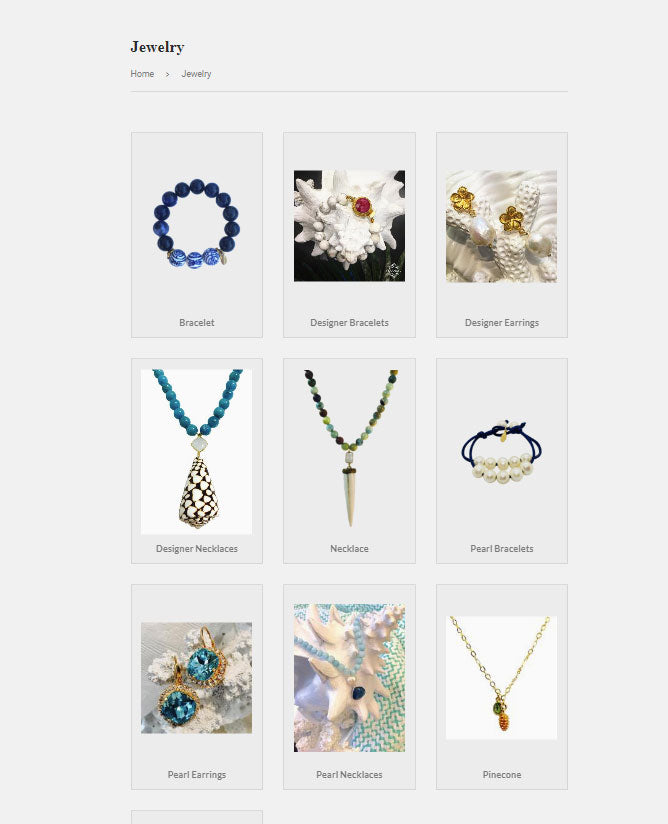
Custom Page Template
You will Create a Custom Page template for each Custom Collections Page of Collections you need. For example: You could have a template for page.bracelet-collections.liquid and a template for page.jewelry-collections.liquid. You would then create a section for each changing the Schema name which is shown in green text within the code.
As always I recommend you make a backup of your Shopify Theme before beginning.
First You will Want to Create a New Page Template in Edit Code Area of Your Theme. Use the name shown in orange or create your own.
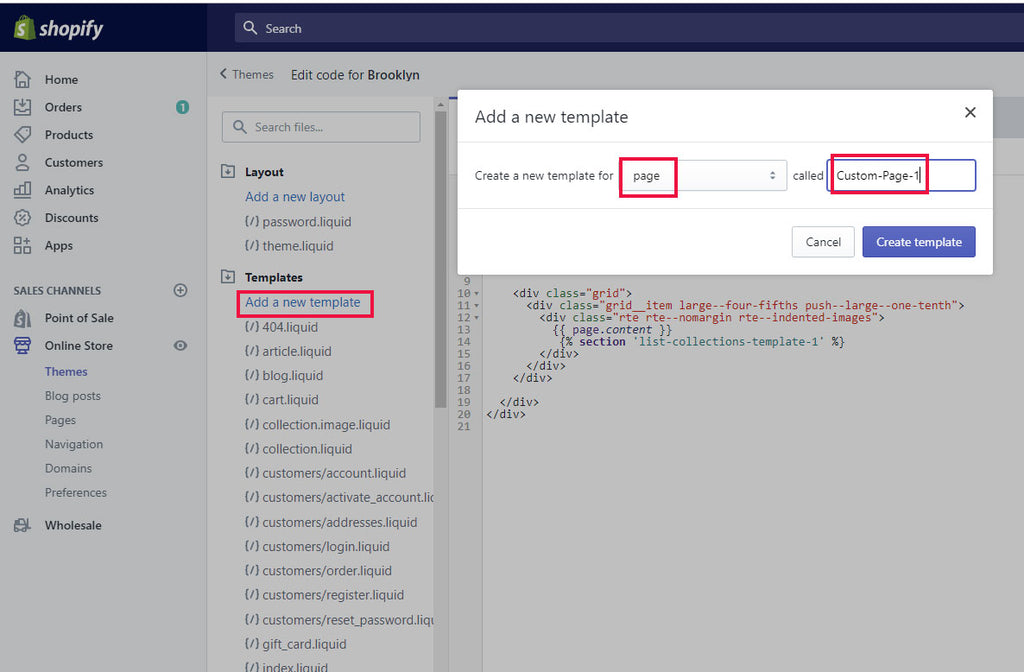
To create a template in theme code editor under Templates choose add a new template. Select page from the dropdown, then enter the name of your template. Copy just the portion in orange below for the name.
yourname-collections
Copy the 1 line of code in blue for page template.
{% section "yourname-collections" %}
Find this code in the template: {{ page.content }} and place the cursor after the last bracket, then hit enter to create a new blank line below the code.
Paste the copied code in the line below the {{ page.content }}.
Copy code in blue from {% include 'breadcrumb' %} to the last </div> below. Note the section name in Green. each new page template will need the new unique section name.
{% include 'breadcrumb' %}
<div class="grid">
<div class="grid-item large--two-thirds push--large--one-sixth">
<h1>{{ page.title }}</h1>
<div class="rte">
{{ page.content }}
{% section 'yourname-collections' %}
</div>
</div>
</div>
</div>
</div>
Custom Section
Note: You Need a unique Schema(see green text below) name for each Section you create. For example necklace-collections.liquid So you will need to create a new page and a new section for this custom collection and edit the new schema name in the new section.
Sample do not copy:
{% schema %}
{
"name": "necklace-collections",
"settings": [
{
To create a Section in theme code editor under Sections, choose add a new Section. Select a name and save. Copy just the portion in orange below for the name and choose save.
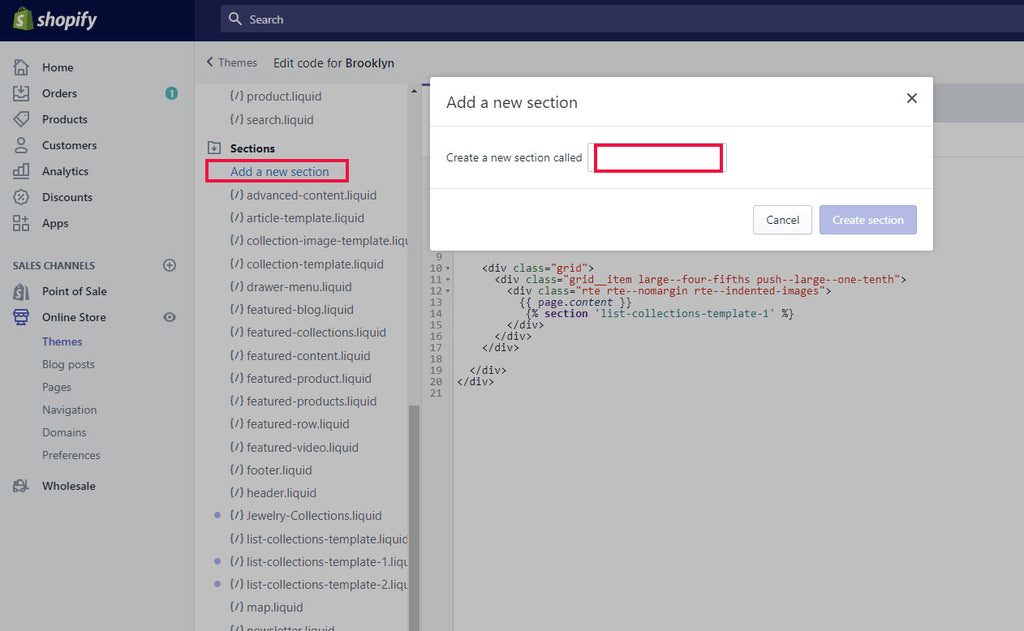
yourname-collections
Delete the prepopulated code and replace with the code below:
Copy code in blue from{% include 'breadcrumb' %} to {%endschema%} below. The Code in green containing schema name can be changed when adding new sections.
New Code
{% include 'breadcrumb' %}
{% if section.settings.layout == 'grid' %}
{% case section.settings.grid %}
{% when '2' %}
{%- assign featured_collection_width = 'one-half' -%}
{%- assign featured_collection_size = '485x' -%}
{%- assign width = '480' -%}
{%- assign height = '480' -%}
{% when '3' %}
{%- assign featured_collection_width = 'small--one-half one-third' %}
{%- assign featured_collection_size = '315x' %}
{%- assign width = '310' -%}
{%- assign height = '310' -%}
{% when '4' %}
{%- assign featured_collection_width = 'small--one-half one-quarter' %}
{%- assign featured_collection_size = '225x' %}
{%- assign width = '225' -%}
{%- assign height = '225' -%}
{% when '5' %}
{%- assign featured_collection_width = 'small--one-half medium--one-third large--one-fifth' %}
{%- assign featured_collection_size = '175x' %}
{%- assign width = '175' -%}
{%- assign height = '175' -%}
{% endcase %}
{% endif %}
{% if section.settings.display_type == 'all' %}
{% case section.settings.sort %}
{% when 'products_high' or 'products_low' %}
{%- assign list_collections = collections | sort: 'all_products_count' -%}
{% when 'date' or 'date_reversed' %}
{%- assign list_collections = collections | sort: 'published_at' -%}
{% else %}
{%- assign list_collections = collections -%}
{% endcase %}
{% if section.settings.sort == 'products_low' or section.settings.sort == 'date' or section.settings.sort == 'alphabetical' %}
<div class="{% if section.settings.layout == 'grid' %}grid text-center {% endif %}list-collections-template" data-section-id="{{ section.id }}" data-section-type="list-collections-template">
{% for collection in list_collections %}
{% unless collection.handle == 'frontpage' %}
{% if section.settings.layout == 'list' %}
{% include 'collection-list-item' %}
{% unless forloop.last %}<hr>{% endunless %}
{% else %}
{% assign featured = collection.handle %}
{% include 'featured-collection' %}
{% endif %}
{% endunless %}
{% endfor %}
</div>
{% else %}
<div class="{% if section.settings.layout == 'grid' %}grid text-center {% endif %}collection-grid" data-section-id="{{ section.id }}" data-section-type="list-collections-template">
{% for collection in list_collections reversed %}
{% unless collection.handle == 'frontpage' %}
{% if section.settings.layout == 'list' %}
{% include 'collection-list-item' %}
{% unless forloop.last %}<hr>{% endunless %}
{% else %}
{% assign featured = collection.handle %}
{% include 'featured-collection' %}
{% endif %}
{% endunless %}
{% endfor %}
</div>
{% endif %}
{% else %}
<div class="{% if section.settings.layout == 'grid' %}grid text-center {% endif %}list-collections-template" data-section-id="{{ section.id }}" data-section-type="list-collections-template">
{% for block in section.blocks %}
{% if section.settings.layout == 'list' %}
{% assign collection = collections[block.settings.collection] %}
{% include 'collection-list-item' %}
{% unless forloop.last %}<hr>{% endunless %}
{% else %}
{% assign featured = block.settings.collection %}
{% include 'featured-collection' %}
{% endif %}
{% endfor %}
</div>
{% endif %}
{% schema %}
{
"name": "yourname collections",
"settings": [
{
"type": "paragraph",
"content": "All of your collections are listed by default. To customize your list, choose 'Selected' and add collections."
},
{
"type": "radio",
"id": "display_type",
"label": "Select collections to show",
"default": "all",
"options": [
{
"value": "all",
"label": "All"
},
{
"value": "selected",
"label": "Selected"
}
]
},
{
"type": "select",
"id": "layout",
"label": "Select layout",
"default": "grid",
"options": [
{
"value": "grid",
"label": "Grid"
},
{
"value": "list",
"label": "List"
}
]
},
{
"type": "select",
"id": "sort",
"label": "Sort collections by:",
"info": "Sorting only applies when 'All' is selected",
"default": "alphabetical",
"options": [
{
"value": "products_high",
"label": "Product count, high to low"
},
{
"value": "products_low",
"label": "Product count, low to high"
},
{
"value": "alphabetical",
"label": "Alphabetically, A-Z"
},
{
"value": "alphabetical_reversed",
"label": "Alphabetically, Z-A"
},
{
"value": "date",
"label": "Date, old to new"
},
{
"value": "date_reversed",
"label": "Date, new to old"
}
]
},
{
"type": "select",
"id": "grid",
"label": "Collections per row",
"default": "3",
"options": [
{
"value": "2",
"label": "2"
},
{
"value": "3",
"label": "3"
},
{
"value": "4",
"label": "4"
},
{
"value": "5",
"label": "5"
}
]
}
],
"blocks": [
{
"type": "collection",
"name": "Collection",
"settings": [
{
"label": "Collection",
"id": "collection",
"type": "collection"
}
]
}
]
}
{% endschema %}
Now Create a Page and Use Your New Custom Collection Page Template
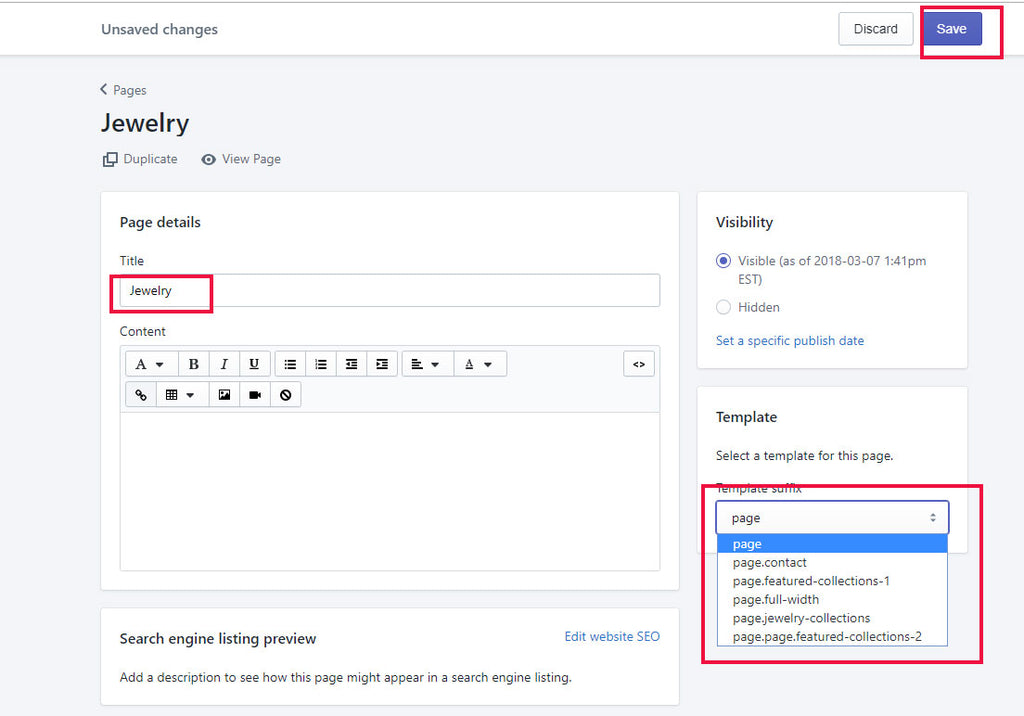
Go to pages in the Shopify Admin: Choose Add a Page. Name Your Page with a Title. For expample if your page is a page of Jewelry Collections, you could name your page "Jewelry". Once named, you can choose the template dropdown and choose the custom-collection-1 template.
Create Navigation Menu to Your Page of Collections
You will need a way to Navigate to your page of Collections in Shopify. Here are the steps to create navigation menus in Shopify.
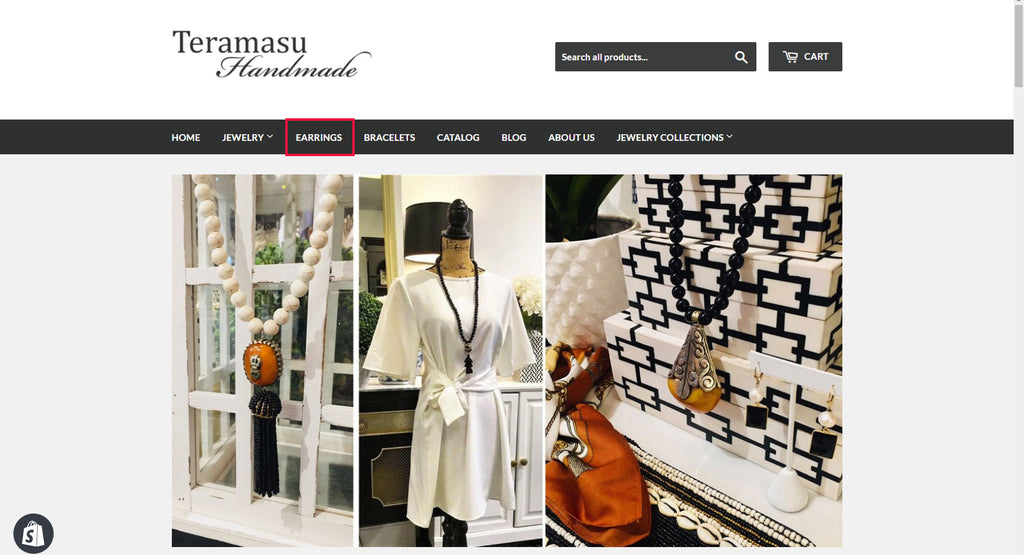
First Go to Navigation in the Admin and Click the Main Menu in Blue to expand the menu.
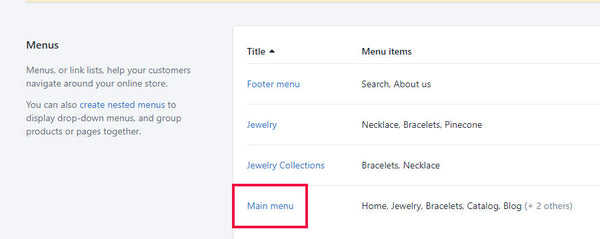
Click Add menu item if you do not already have a Menu where you want to connect the page.
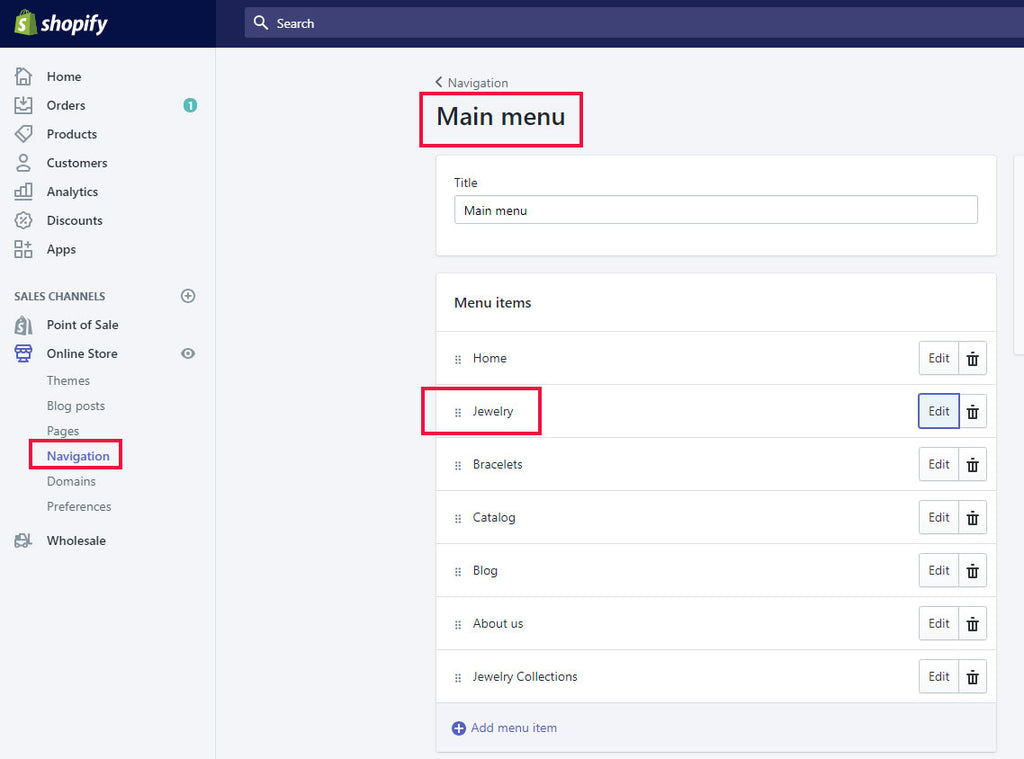
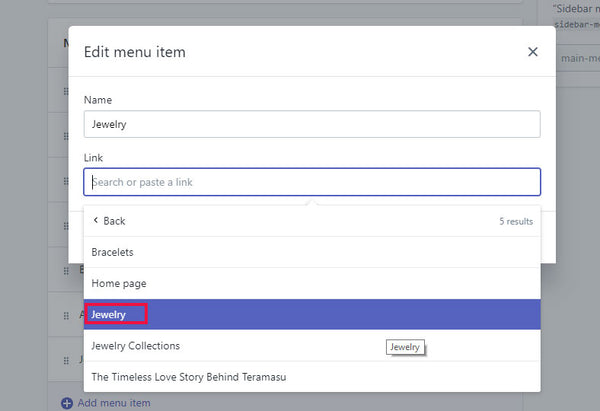
Otherwise, Click edit on the menu you want to Connect. Add the Name and Select Page then Select the Pages.
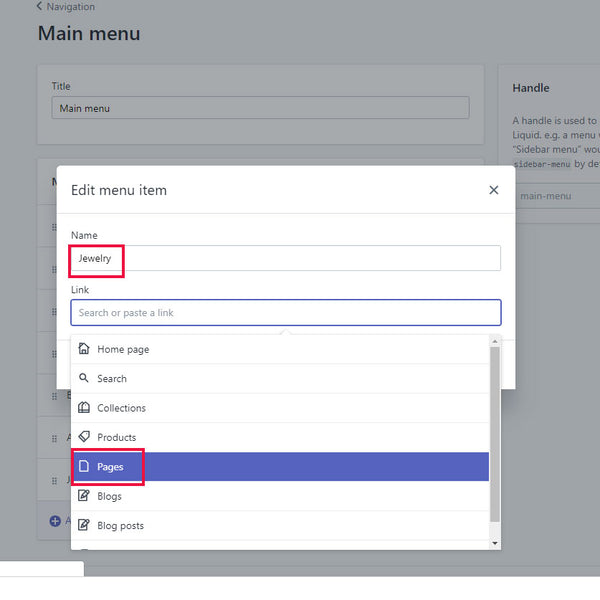
Now Select the page of collections where you wish to connect the menu and Apply the changes.
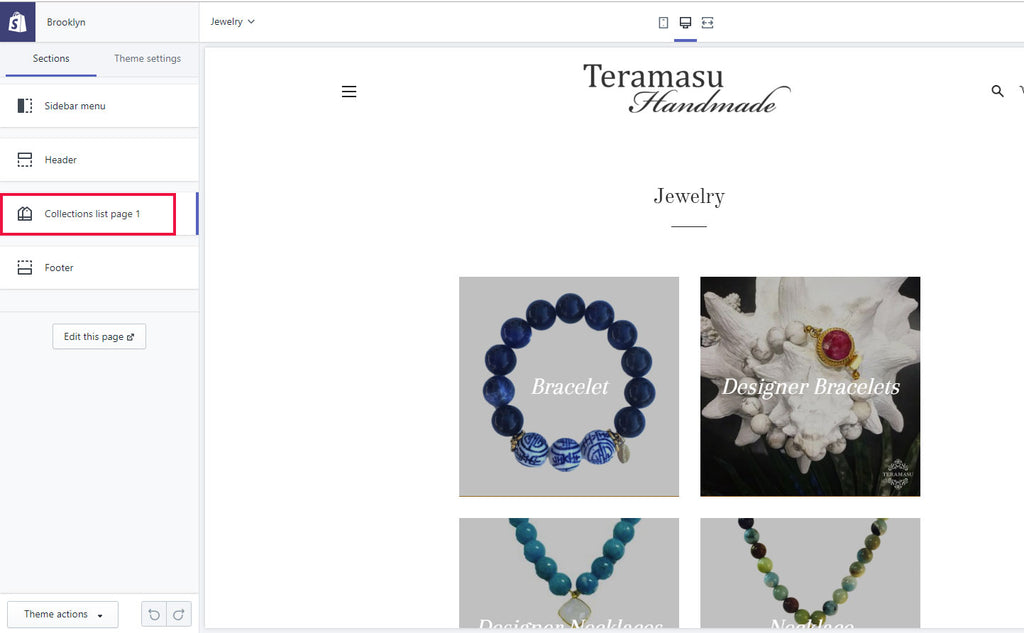
Finally, You can go to online store and choose Customize theme, navigate to your page and start customizing the collections that appear. Click on the Collection list page section.
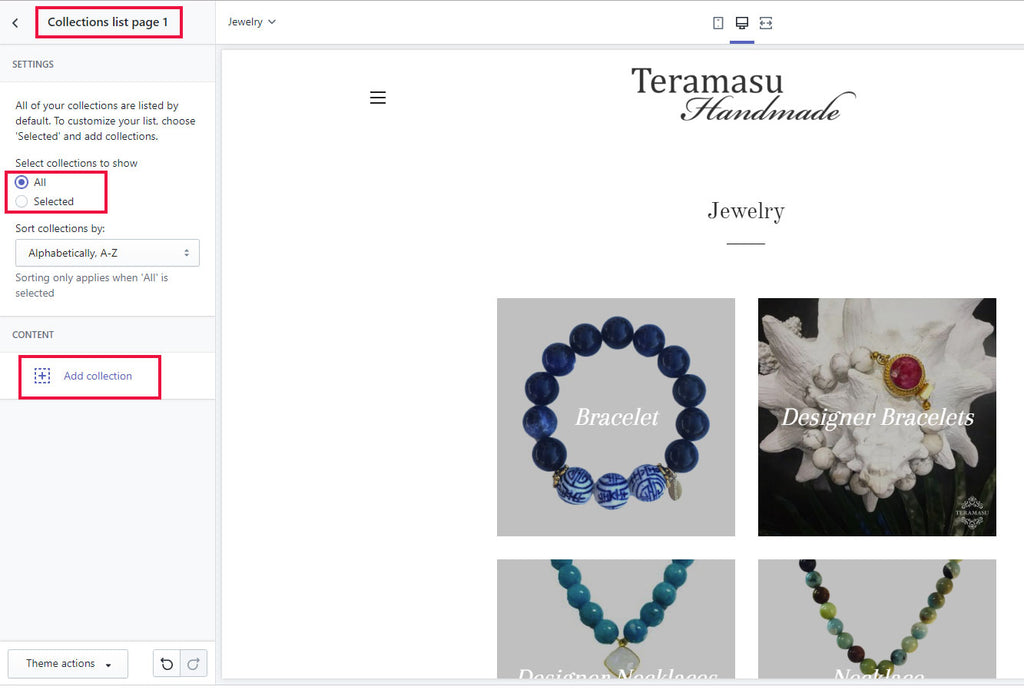
You will have the Choice to Show all or just selected collections. Choose selected and start customizing your page.
Let me know how it worked for you!
17 comments
Thank you so much! I have been looking for information on how to do this for 2 weeks now and you made it so easy.
Hello! Thank you so much for your tutorial. IT is very well explained. I am trying but, as I have other theme looks weird and doesn’t work propperly. Do you know how can I get Handy theme code for the new template? It is impossible for me to find it. Maybe, there is a way that I don’t know and you can explain. Thank you so much again for everything!
Thank you for posting this video.
I was dabbling with this and I encountered this as I navigated to the page I created “womens fashion”
Liquid error: Error in tag ‘section’ – ‘womens-fashion-collections’ is not a valid section type
Off hand, would you happen to know what I’ve done wrong?
Hi, I struggling with the empire theme too (a couple of other people have also commented before). Any fix? Please help.
For me when I follow up above steps all I can see are the header, page title and footer. I can’t see any way to add specific collections that I want to.
TIA
Perfect guide, simple, easy – exactly what I wanted to achieve.
Only slight annoyance is the width of the page, not being able to show more collections with a decent size image but i assume the theme page width parameters are the cause of this.