Shopify Overview Getting Started Step by Step

Get the latest review of the brand new Shopify POS iPhone app with a full walk through on leaning how to use this app with the Shopify mobile app to run your store and website from your phone.
Listen an overview of the powerful features built into Shopify is the latest 2015 review.
Video Transcription of How to Get Started with Shopify
Hello, this is Kevin King with Pinehurst Websites. We're ready to get started with a Shopify website. So we went over - before in the previous video - some of the benefits of Shopify, stunning design, show your customers you mean business. You've got a very user-friendly interface, a lot of powerful tools like social media integration built into the site. You've got a huge app store which adds additional functionality to your website with Shopify. Most importantly, you have secure checkout. So we went over some of those things earlier. Now, let's go through some of the basics of setting up the site. Where we left off before in the previous video was signing up for a free trial. So if you haven't done that yet, we're going to do that in a second. We'll walk right through it. So now what I want to do is I want to go over some of the benefits and some of the things that we're going to cover in this particular video. We're going to sign up for the free trial. We're going to start adding product to the site. We're going to add a custom logo. We're going to add a slide banner.

We're going to do the social media links on the site. It's kind of like a step by step, but really, I want to do the things on the site to show you how easy it is. I think that's the best way to do an overview. It's pretty quick but it's worthwhile taking a look at before you get knee deep in it, to really start doing things on Shopify, and learn how the platform works. It's very easy to work with but it just takes a little bit of time to get to know it. At the end of this video, we're going to do some product images. We're also going to talk a little bit about SEO and how Shopify's optimized for it. Some of the things in Shopify are automatic for SEO, but some, you really just have to do a few steps to just optimize your site. The tools are built in there, you just have to know what to do. I'm going to go show you where you need to put in special things for SEO, and where you're going to see those results on the internet if you're doing a Google search for instance, so how to help you come up in a Google search. So let's go ahead and get started.

Okay. So if you haven't opened up a free trial account, there's a link in the description below this video. You can see it's right here at the bottom. You just click on that. I'm just going to open it in a new tab. That will open up a new tab here and then that's got a free trial right here. You just put in your email address and that's all you need to get started, so just click Get Started. It's going to ask you create a password and a store name. So in your password, just create a nice secure password. Make sure you write down your password, of course. Your store name, I'm just going to call this one, "Amazing Accessories." Now, if you want to do a POS, this is a good time to do the POS. If you have a store, this is great because it saves you a lot of labor when you manually have to keep your inventory straight. So immediately when you sell an item on the web, it will pull it out of stock for the POS and vice versa because they're a link. They're both running off the cloud.
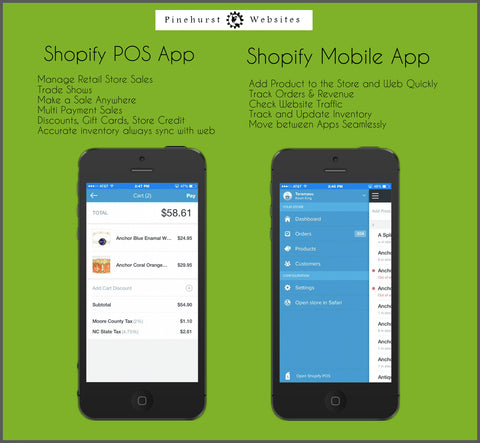
So it's really a fantastic thing just for the inventory management. So let's go to the next. I'm just going to click "Online Store" for right now, and then you put in all your basic information. So I've put all my basic information in here and head over to the next step. Okay. Welcome to the Admin. This is the back end of your Shopify store. So this is where you'll make all the changes and you'll put in all the administrative things in your side. You'll build your store in here. It's very simple to work with. As you can see, you've got built-in instructions, starting. So Shopify is giving you a list of things that you need to do to start your store right here, "Add a Product" right in the middle right here, "Customize the look of your website," and "Set up your domain." So you can just click on here and start beginning. So let's begin with a quick preview of the website. We're going to look at what it looks like by default. If you click right here in the center, it's going to say, "View your Website." This is the default.
It's called "The Launchpad," which is the default theme in Shopify, but you can really get very elaborate themes and they're really reasonable compared to what it would take to do a custom website. So if we look at one of my websites right here, I'll just show you, if we look at the front page of it, it's a custom theme. This theme runs about $180. It has a lot more available features built into it. It has a Twitter feed here. We've got our blog post, multiple blog posts on the front page. That's one of the things that helps you come up in search engines, is blogging. Basically, it's very similar to just creating a post like you would on Facebook, except you're doing it on your own site. This way, it actually helps you to come up in search results. So we'll get to a little bit more of that later. But you can get a more elaborate custom theme from Shopify, which I would definitely recommend because there's a lot of features built into it that you don't actually even see, and that would be in the actual coding of the site.
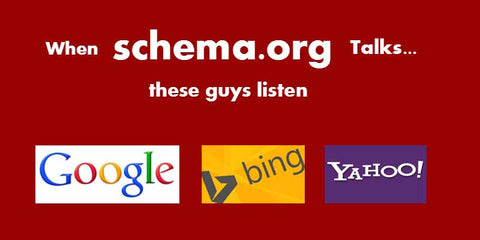
This particular theme has a special code in it that actually helps you to come up higher in search. It's called Schema.org markup. Basically, it's a type of coding that tells the search engines, "This is actually a picture of a product." It's telling the search engine, "This is the name of the product and this is the price." So all of that really increases the search engines like Google and Bing. It increases your rankings because they know exactly what this is all about. It's called SEO, or search engine optimization. So let's go ahead and just take a look at the default theme again. I'm going to show you how to quickly edit this default theme, and then later on, we'll get into how to get one of the custom themes like I had on the other site, to get you really more of an advanced site. But if you just want to get up and running, you can use this default theme. I'm going to show you what you need to do to get started with it. So you can see that we've got Amazing Accessories up here at the top.

This can be changed. The font can be changed and you can put spaces in the Admin. So if you don't have a custom logo, you can still make changes to this. I'll show you where to do that in the Admin. What we're going to do is we're going to put in a custom logo. I'll show you how to do that as well. Then in a little bit, we're going to change out the navigation menu. We're going to change that a little bit and add to it. The example product comes up initially, but that will change once you add your first product. As you scroll down to the bottom, you're going to see some example feature products and a front page collection, which this can be changed or removed from the front page. Then you've got an excerpt from a blog post, which will show your new blog posts once you start. You can delete this first post and just create a new post. Then you've got your social media links down here at the bottom. By default, they're going to point to Shopify initially, but as you can see in the bottom right hand corner, Twitter/Shopify, and you can just copy and paste your link in there.
We'll do that in a little bit. Then you can add the different payment types that you want to receive on the bottom. I already added a couple, but I'll show you where you can do that as well. So let's go on up and take a look at changing out our logo. So first thing we want to do is if we want to just change our logo and put a space in it, if you didn't put any spaces in, we'll just go to Settings, and this is where that space happens. So if we put that space in there, it's going to add a space to our logo on the front page. I'm going to save that. You want to make sure you fill out up to 70 characters here. Here on your Homepage meta description, that's what's going to come up in search. So I'm going to go ahead and save this right here. Okay. So Homepage title and Homepage meta description, let me just show you where that is going to come up. So the Homepage title is going to come up when you do a search. This would be the Homepage title and then you're going to have the URL, which is going to be your URL for your homepage. This is where the description for the homepage is going to come up.
So you only have 170 characters or it's going to look like this, dot dot dot. So use your 170 characters. Right here, it's going to tell you when you get to 160 characters. Then you have 70 characters for your homepage. So you want to use a natural description. Don't just plug in a bunch of key words that you want to try to rank for, but try to use a natural description of what your page is about. For instance, "This is a boutique page with accessories for women." So you want to use as much of it as you can. If you want to say, "We feature watches, jewelry, and purses," in addition to that, that would be good too. The same thing here, you want to put it as descriptive as possible but don't use too many characters. So that's where your Homepage description comes in and it's very important that you fill this out for SEO. So let's go ahead and refresh our page. We're going to see that now, because I've changed that in the Admin., it adds that space here. So if I want to change this text here, we're going to go into the theme editor.
So let's go back to Admin. on the upper part of our left hand menu and then let's click on Themes. So let's go to Customize Theme and let's go to Typography. We're just going to change the heading font. It's on Cabin right now. Let's change it to Lado, and see how that changes our text right here. So that will change it. That's a live preview, which is nice, so you don't have to go back to your website to see what happened. If we want to check through, there's quite a few different fonts here. These are Google safe web fonts. So if you want something that looks a little bit different, use a custom logo and that will put an image in on your page. Let's go ahead and use a custom logo, if we go out of here and we go to our Typography. I'm sorry, not Typography. But if we go out of here and we go to our header, we're going to use a custom logo. I put one in here just so you can see. Normally, when you first come here, it's going to say, "Choose File," like it does down below.
So I put in something so you can see. If you had to replace it, you're going to go ahead and just click on the Replace. Then you can upload something from your computer. So I've just replaced it and I'm going to click on Use a Custom Logo. You'll see the change here on the left, once I click that box. Now, I use a logo that is no more than 100 pixels high. I think that's one of the best ways to display. So once you put in a new product, it's going to change out this example featured product down here. Let's go ahead and save our changes. One more thing before I do, is I'm going to show you logo and navigational alignment. If you want your logo to the left, it will bring it left of your navigation menu right here, if your logo is not too big. If your logo's too big, it's going to push these navigation menus, if you have more, down into two columns. So I'm just going to center this logo, for right now, below my navigation menus, which these are my navigation menus. So let's go ahead and save that.
One quick note before we leave this page is this right here, where it says, "Choose File and Use Custom Icon, 16 pixels by 16 pixels," this is for the favicon. The favicon [SP] is this little logo you see. This has Shopify's favicon, which is on here by default. But you can put a custom favicon, as you see right up here on the top of this page and on the top of this page, both of these pages I've used favicons on. So if you want to do a little custom logo, it's best to make it square and make it 16 by 16. So that's where you will do it, is right here. You'll just have to check mark this and then upload your file right here. Let's go ahead and move on. The next thing we're going to do is go in and we're going to add a product. That will change this to the product that we've added, and then after that, we're going to add a slide banner to our web page to change the look even further. So if we want to go back to our theme and look at our Theme Manager, we can go back here and now we can add a product. So let's do that next. Okay. What I'm going to do is I'm going to show you how to use this right here.
Instead of going here to add a product, I'm going to show you how to use this left hand menu because that's where you're going to add a product. If we go over here, the first time you're going to have a button here and also to import products, but after that, it's always going to be here. So let's go ahead and click in the upper right hand corner to add a product. So this gets you started. You want to put in your title, your description, the item type. In this case, we're going to add a purse. We'll call the vendor Teramasu. That's the manufacturer. We'll just go through everything that you're going to do here, but it's pretty quick. So let's just call this "Yellow Designer Purse." Just for the sake of argument, the description you want to be more elaborate here, from Teramasu. We don't need to put the vendor here. Okay, so from Teramasu Limited Collection. The product type is going to be purse or handbag. The vendor is going to be Teramasu Limited. Okay. So now we put in a price, $149.95.
If you put in the compare price, $179.95, that will come up with a line through it, right next to your product. In other words, this is the suggested retail and this is our amazing price. So if you have a SKU number or barcode, you can put them in here and here. You can look up by those and you can also use those in the POS to do scanning, the barcodes. You can use the SKUs to do look-ups as well, in the POS. Most of the products, unless it's a service, require you to charge taxes and to ship. It will only charge taxes in the state where you're located, unless you happen to have a presence in another state, then you would be required to pay taxes there too. But you only have to pay taxes when you're shipping within your own state. So we're just going to put one pound. If you don't put a weight in on an item, say for instance you charge free shipping, it's not necessary. But if you charge banded rate shipping, in other words, you say from zero to five pounds I want to charge $5 or $4.99 for shipping, it will never get to five pounds if you don't have weights in on your products.
So make sure you put a weight in on your products. We're going to track inventory. If you don't track inventory, it will allow you to sell the item even when it's out. Then this allows you to sell different colors or different sizes of the item. So you may have multiple sizes, multiple colors, or different styles. This is where you can add a blue purse, or if you had it in a large and a small size, you could add it all in right here. So I have a separate video on that and you can go check that out. We're not going to create any variance, so it's just going to have one variant. My file is right here. I've already selected it, and this is where you upload your image. Once you've selected your image, you just open it and it will download right here. At the end of this, once we show you how to create a product, I'll show you how I took the picture, if you just keep watching at the end of this video after we've created the product. So let's go ahead and save this product. Now we've created the product.
This is pretty important. We're going to put in some alternate text and that really just tells the search engines what the name of this image is, what this image is about. So it's pretty important, always good to do alternate text any time you do an image on a website. That's ALT. It says, "Edit Alt Text" right here. That's where you can put that in. This is an editor where you can go in and actually edit the picture, if you want to crop it or do some touch up on it. It's a built-in editor in Shopify. It's kind of a nice feature if you have to do a quick crop of an item, for instance. As far as collections, this one's going to go to the front page. You can assign where you want products to go to. It's because it's our first item, it's going to go to the front page and it will show up in our front page. Then tags, these can be used to filter items or create collections. All of this information comes from what you put in at the top, and this is called the Page title and Page meta title. This is the URL or handle.
So whenever you do a Google search, let's just take a quick look at a Google search. So if we put in "Starfish jewelry collection," you'll see this is the page title, Starfish jewelry collection. This is the handle and this is the meta description. So that is automatically filled out for you when you put in your information up here. It comes out down here. This is automatically created for you. This makes Shopify a really good choice when you're doing search engines because all of this work is done for you automatically. That's all there is. Now let's go ahead and view this on our website, and take a look and see how it looks. If you click this button to the left, we can view it and see how that looks on our website. We can see the change where I had changed the color on this. We've got all our buttons over here on the right. That's a pretty nice looking little website. We can start working on our front page as well. This is going to the front page as well. So this product, it has sale on it also because we did that compare at price.
So that's all there is to adding a product. Now we can add another banner that will go on the front page, to really enhance our front page. So let's do that next. Okay. Let's go ahead and customize this home page a little bit. What we want to do is we want to go into the theme design here. Let's go ahead and click on "Customize Theme,"and that will be on your left hand menu, Themes over here. Then on the right side, just click "Customize Theme." What we want to change is the Home page. That's going to be your main landing page. Let's go ahead and create a banner here. I've got a banner right here. I'm going to click on that and go ahead and show this new banner that I just put in. This is part of my front page collection, so it's coming up here. Then I've got the text from front page coming up here. Let's go ahead and take those off. If we scroll down to the bottom, we're going to see we can take this - and this is the collection that's being featured, which is right here - and we can take that off.
If we had another collection that we created, we could put that here and all our collections will show up here. Let's just change this to "None," and then let's go to the one on the bottom with the content. That is where this content right here - these few sentences are coming from - are coming from front page. It comes up right here and let's go to None. Let's just go ahead and save those changes. Let's just go in and I'll show you where you can put these links in here. Let's go back up from Home page. We're going to go back to the menu here and we're going to go back down to the footer. In the footer, you're going to be able to put a newsletter in here. Let's just show it, so we can see what it looks like because well, you want to set up the Male Chimp account. I'll show you how to do that later. Then, we want to show our social media. So I've already changed this link. By default, they're going to have Shopify in here, but you just put in your Facebook link.
So you can go to your Facebook page and can copy it. If you set up a Facebook for business, you should have applied for a vanity URL, which would be Facebook.com/ the name of your company. The same thing with Google Plus and YouTube, you just post the links right in there and then it will show up. Once you put that link like I did with Teramasu here, we can click Save Changes. Now let's go over to the site and let's refresh it. Now we see our page is starting to look a little cleaner. We've just got our newsletter down here. This is not hooked up yet, but I did hook up the Facebook, so you can see that this will hook to our Teramasu Facebook site. This is what our site is looking like now. There's a couple other things we want to work on. As you can see, everything in the theme, we can do here. We can do our social sharing. We can hook-up a Twitter feed on our site. We can go to our footer, our header. We can make changes on our logo. We can change the colors in our theme. We could change the background colors, for instance.
Okay. So what I'm going to do is I'm going to go to colors and I'm going to change the color of this button over here where it says View Products. So let's just go to Colors. You see that this is a red color right now. I'm just going to change it down to a blue color. You can either click here or you can put in a hexadecimal color number. That's all there is to it, so very simple. We're going to go in and make some other changes to colors. We'll just save these changes. Let's go in and do maybe a change on the background colors now. Let's just change this background color a little bit. Let's just make it slightly off white. It just gives it a little different texture to the site. If we go back to themes and we just want to see a preview of this. Now, since this is on a white background, it's going to stand out, but we could change this background to the same slightly darker background. Our store is starting to come together. Maybe we want to change these navigation menus right here. Let's go in and do that right now. Where we're going to do that is under navigation, right above Themes.
By default, everything that you create goes into this collection called Catalog. We could either add a new collection, let's add a new collection. We're going to create a link where we could override this catalog. So let's just create a link called Purse Collection, real quick. We don't have a purse collection yet, so we're going to have to go in and create that. Let's go ahead and save this. Let's go back over here to Collections. We're going to create a collection. We just add a collection right here and it's just like adding a product, except you don't have to put in quite as much information. Now you can put a more detailed, you know, Designer Purses, for instance, or something like that. Call it the Designer Purses Collection. We're going to do that and we're going to use by item type, any item type that is equal to purse. When you start typing, it's contextual. It will show you any ones that you have in there. Let's save that and it's automatically going to put that purse - because the item type is purse - into this collection.
So let's go back over to our navigation menu and let's go over to Edit that Link List. It's called our Main Menu Link List and now we're going to connect it. We could connect this to a page, a product, or we could connect it to all products, or we could connect it to our blog, or a specific web address even on another page. Let's connect it to a collection. We only have two collections, so let's connect it to Purse. So now, when we go to that, back on the site after we've saved it, we're going to refresh. Now we've got this right here and it's connected to our purses. We can go in and we can see our item on our site there. Let's go ahead and move this menu over next to Catalog. Let's take a look at that. All we have to do if we want to move that menu over is just grab it by this handle and just drag it up to the top. Now if we saved it, we can go back over here and when we refresh our page, we're going to see that Purse is now over here. So it's very easy to move things around and to make your site get that customized look that you're looking for.
So right now I want to go in and add a page. We'll add some content from that page onto our home page. So pages are over here on the left hand menu and they work very similar. Everything in Shopify has a very similar layout to it. So this is very much like the Product and the Collections layout, and also the Blog post layout. So I'm going to click in the upper right hand corner and add a page. I'm just going to call it "About our Store," and just put a little snippet about it right here or an excerpt. As I save that, it's automatically going to fill out my SEO information down here on the bottom. So let's go back over to Themes, and let's go ahead and customize our theme again. Now we're going to go back to the home page and you can also add additional images right here on the home page. Now this becomes a slide, once I add an image into here. You just go in and you add an image here. You can replace it over here if you want to change it out, but you see now that I have a slide. Let's go down and, also, let's add that page that I just put in there.
We're just going to add the drop down. This should now show up under Pages and it's About our Store. As we see, it comes up right here. So when we go into a page and add a page like we did, we can add images, we can add video in here in this page. It can all show up on the home page. You can really get creative when you create new pages for your site. You don't have to display anything on the home page here. Let's go ahead and take another quick look because I want to show you something about the slides. So I'm going to save the changes. I'm going to refresh this, the actual web page here. You can see, I've made one of the slides intentionally a little bit smaller. You're going to see that because this slide is smaller, it's bumping this up and down as it slides. So you want to make sure your slides are always the same size in the height and also in the width, but in the height so you don't get this effect where your content bumps up and down every time the slide moves. So that's pretty much a preview of adding a product.
All these slides, by default, are connected to the Catalog page, which shows all of your products. So when you click on the slides, you can go and you can go directly to all the products it will show that you have. But since we only have one product, it's just going to this one product. But if you wanted to put a custom link in a slide, you can connect it to a page, or to a product, or anywhere you want on a website, or even to another website. So now we're going to go in and show you how you can take pictures of your products, and really clean them up very easily with some really nice shortcut tools. There is a website that will actually cut out products onto a white background for you. So that makes it really easy when you're shooting images, that you can just clean them up very quick by going to this website. So that's coming up next. The first thing you want to do is you want to take a picture of the image, unless you have an image and you can get an image from your manufacturer, or from the company that you're buying product from.
So let's just go through and I'm going to show you how to quickly take an image right on your iPhone. So all I've got here is I've got a piece a paper. It's a cardboard, basically, that is white matte cardboard. My lighting is not super perfect in here, but it's pretty good lighting, enough that I can see the product. So I've got this piece of cardboard curved up to create an infinity wall. If I take a picture of my image and I'm using an iPhone right here. So I just shoot the photo. I have a nice photo on my phone now. So now I want to get that photo cleaned up. What I like to do is I like to use Google Drive. So if you download Google Drive for your phone, this makes it really easy to go and to clean up items on your website. So now I can just hit Plus and I can upload this photo to Google Drive. So here's my photo. I just hit a checkmark and then that goes right over to Google Drive. I'm going to do the rest of this. I could clean this up and I could actually put this right on my iPhone. I could put it onto Shopify's website right from my iPhone.
But I'm going to do it on the computer. So let's go over to the computer and we can take a look. Okay. So I've synced my Google Drive folder, which is on my computer, in My Documents. As you can see, it's right here on my computer. I have this image that I just took. Of course, I shot it pretty quick. A little better lighting is going to make it an even better image. But let's just go ahead and choose this file. I'm using this site right here. It's called Background Burner. If you go to backgroundburner.com or bonanza.com/background_burner, you can find this. This will just help you to clean up your images very quickly. So all you do is you select the image. As you can see, I'm selecting it from my Google Drive. It's going to upload that image to the site and then it's going to try to cut it out as best it can figure out. If you have to touch it up, you can choose the areas where you want to touch it up. So it's very simple to work with. It's giving me a couple different options. So this first option, it's really cut it out pretty nicely.
The second one's got a little bit more shadows in it, but they're both pretty good. So if I wanted to go to the first option, I could just click on Touch Up, or I could just select the second option, or I could touch up the second option. I don't mind a little bit of shadow in there. I'm just going to hit Touch Up so you can see what that's all about. I would think this would be good enough. It's cut out good enough, but if I really want to get in there and clean up this area in here, this is my preview. This is the area that's being selected in the outline, the yellow line that goes around it. So I think that's pretty good. I'm just going to take this smallest brush - you have three different sized brushes - and I'm going to blow this up as much as possible, and just get into this little area and see if I can just make a little selection so that it cuts this area out. So it's cut out this area over here and you can see that it just cut out the top of this. So the red takes it away and the green puts it back in.
So if I take the green and I get over this little ball right here, then I can just fix this. You'll see on the left hand side, once I have selected it, it has put that in there. Also, right here, there's just a little shiny part right here that I could probably put back in, to just smooth this out a little bit. That just brings up the top of the frame of this purse. So that looks pretty good. Now that I've got that, if I mess up on one of my selections, I can hit the undo button right here. But this looks pretty good so I'm going to hit Save and close. You can see, it's very quick. We shot a picture. We've cleaned up the picture. Now, if you already have images of the products from the vendor that you buy from, for instance, now you have the option to download it as a JPEG or a PNG. So I'm going to download this as a JPEG, so now it goes to my download folder. I happened to have it opened up in Photoshop, but that's a pretty good image. Of course, I can check my image size real quick. Looks good, so maybe I'll just blow this up to 1,000 real quick. So I have a pretty good image here.
I'm going to go ahead and create an item. So let's do that next. I think if you watch this video, it shows you a pretty good insight into what it takes to set up a site on Shopify, and of course, in getting a more advanced theme. That's something that I'll go into in my next video. That's where you really get a lot more features and you get a lot more fonts that are available, so you can really tune in and really create a different look to your website. So even with the most basic theme, you can create a clean looking website. It's very easy to link your bank account with the website. It's not too bad as far as if you have a current domain that you own, linking that website name to your Shopify store. But if you need help with any of this, please definitely contact me. I'm a Shopify set up expert. I'd be happy to help you set up your site. I've done it for many others. I definitely enjoy helping you out, helping you learn about your Shopify store, and empowering you so that you can take over doing some of these things yourself.
When you want to make a change, you'll find that it's very easy to do in Shopify once you get a basic understanding or a little bit of knowledge. That's one of the things that I work on, is trying to teach my customers what it takes, as far as what they need to do for their website to increase their search rankings so that they can generate traffic, but also, just making basic changes to their website without having to rely on somebody else all the time. Well, thanks for tuning in and check out Pinehurst Websites. Please like and share this video. Hope you found it helpful.
Kevin King
This latest review give you step by step instructions how to start setting up a Shopify Website by Shopify Expert Kevin King. This is one of the first tutorials reviewing the new Shopify theme editor which previews change to your webpage instantly as you change your theme settings. The tutorial also covers how to take pictures for your website and easily cut them out on a white background in seconds. Most importantly it describes the valuable and powerful SEO (Search Engine Optimization) features built into the Shopify eCommerce platform and how to understand and maximize those tools to help your website show up in a Google search.
Written by: Kevin King
Date published: 03/03/2015
4.9 / 5 stars